User Guide
Everything you need to know about FixerUppera
1. Quick Start
Get your first furniture transformation plan in under 2 minutes. Here’s how:
Snap a Photo
Open the app and tap the camera icon. Take a photo of any piece of furniture, or upload one from your gallery.
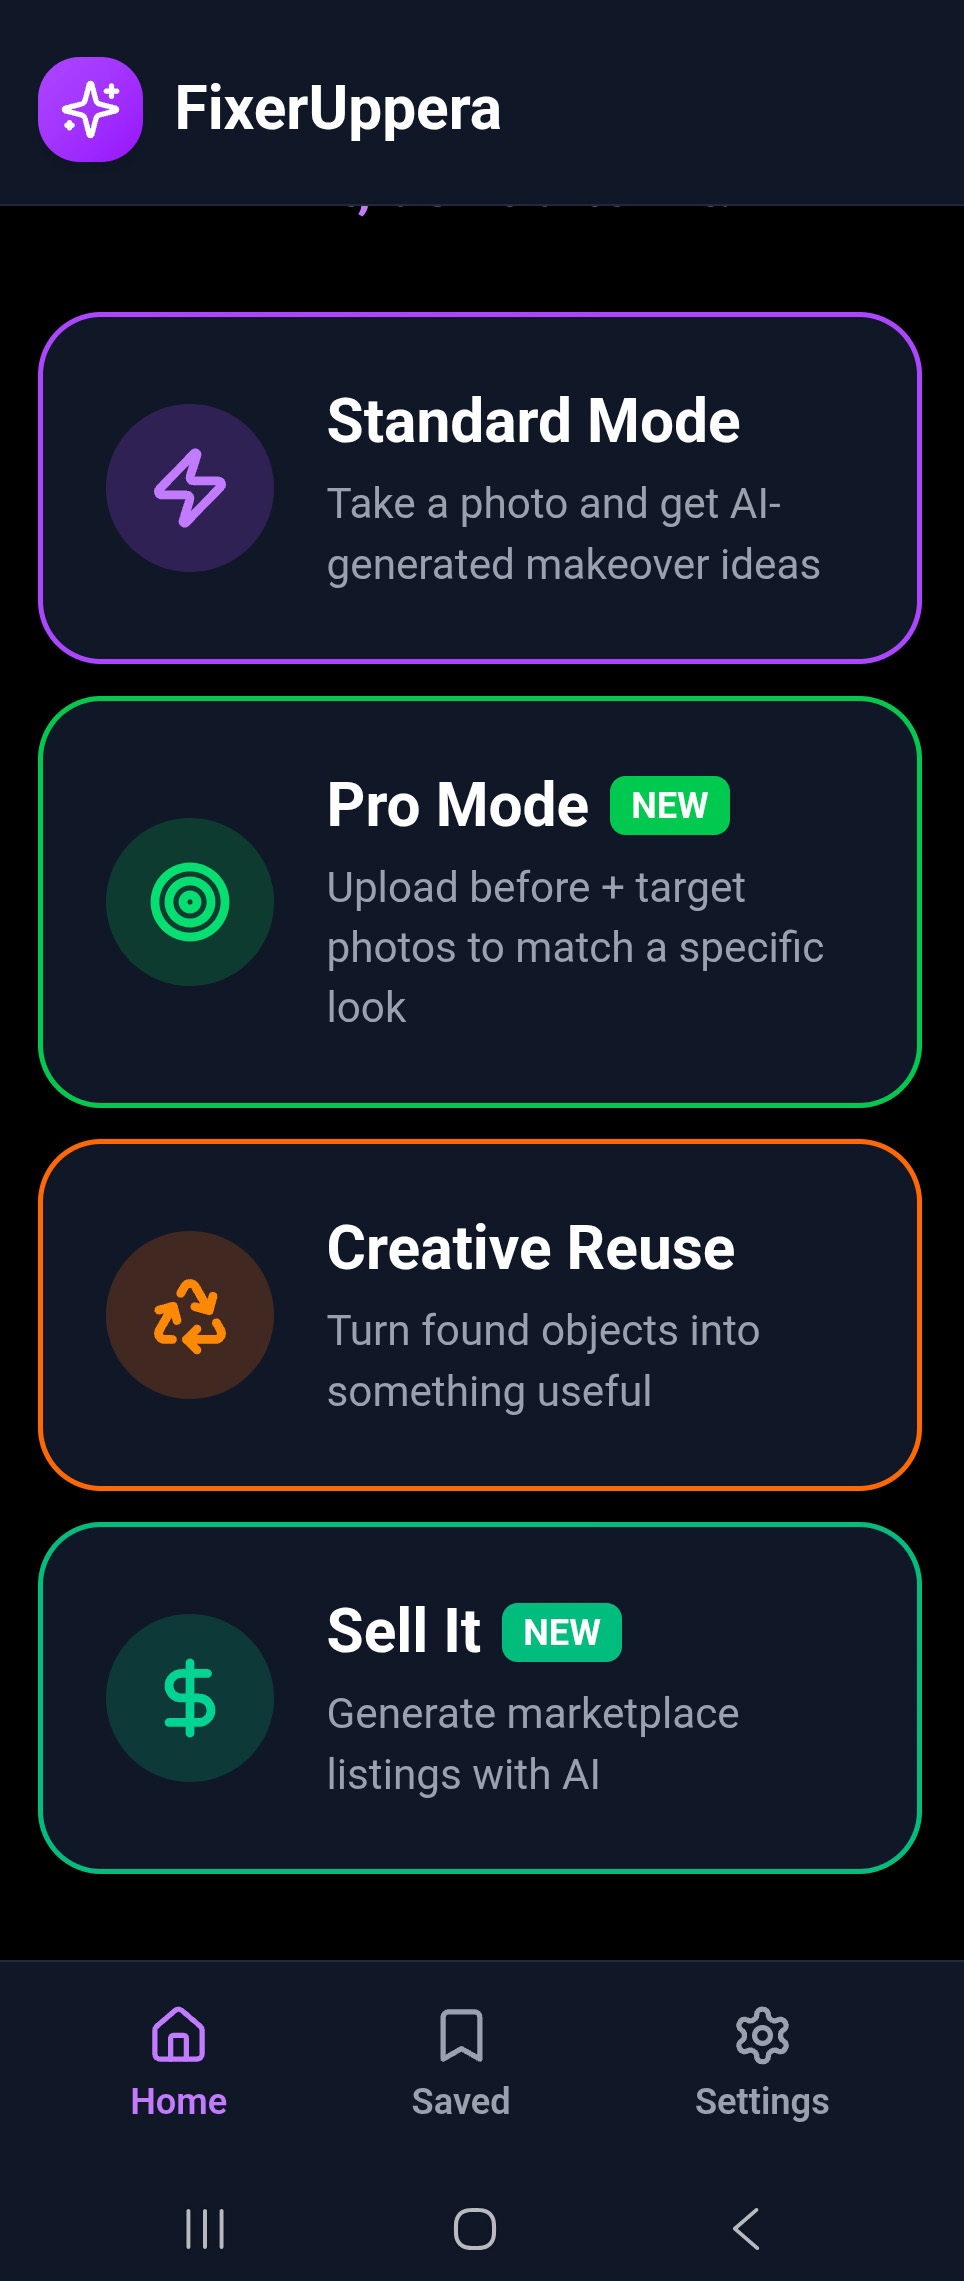
Choose Your Mode
Pick Standard for quick ideas, Pro for style-matched transformations, Creative Reuse to reimagine the piece entirely, or Sell It to generate marketplace listings for finished flips.
Get Your Plan
AI generates transformation ideas with step-by-step plans, shopping lists, cost estimates, and concept preview images. Save, share, or start building!
2. Getting the App
Download
FixerUppera is available to download on Google Play with a free trial period.
- Open the Google Play Store on your Android device
- Search for “FixerUppera”
- Tap Install
- Once installed, tap Open to launch
Requirements
- Android 7.0 (Nougat) or higher
- Camera access (for taking photos)
- Internet connection (required for AI processing)
- Approximately 50 MB of storage
3. Onboarding & First Launch
When you first open FixerUppera, you’ll be guided through a short onboarding flow:
Welcome Screen
Introduces you to FixerUppera and what the app can do. Tap Get Started to continue.
Choose Your Mode
A brief overview of the four creative modes. You can switch between modes at any time, so don’t worry about picking the “right” one now.
Camera Permission
The app will ask for camera access. This is required to take photos of furniture. You can also upload photos from your gallery if you prefer.
Ready to Go!
You’re all set. The app opens to the home screen where you can start your first project.
4. Home Screen Overview
The home screen is your starting point for every project. Here’s what you’ll find:
Mode Selector
Switch between Standard, Pro, Creative Reuse, and Sell It modes at the top of the screen.
Camera / Upload Button
The main action button. Tap to take a photo or upload from your gallery.
Saved Projects
Access your previously saved transformation plans and mockups.
5. Standard Mode
Standard Mode is the quickest way to get transformation ideas. Take a single photo and let AI do the rest.
5.1 Taking a Photo
- Make sure Standard Mode is selected at the top of the screen
- Tap the camera button in the center
- Choose Take Photo to use your camera, or Upload from Gallery to select an existing image
- Frame the furniture so the entire piece is visible with good lighting
- Tap the shutter button or select your image
5.2 AI Identification
After capturing your photo, AI instantly analyzes it and identifies:
- Furniture type — chair, table, dresser, bookshelf, etc.
- Material — solid wood, MDF, metal, upholstered, etc.
- Condition — good, fair, poor, needs repair
- Style — modern, vintage, mid-century, rustic, etc.
The identification results appear as a summary card. Review them to make sure the AI got it right — you can retake the photo if needed.
5.3 Setting Constraints
Before generating ideas, you can optionally set constraints to guide the AI:
- Budget — Set a maximum budget (e.g., $50, $100, $200+)
- Skill Level — Beginner, Intermediate, or Advanced
- Style Preference — Modern, Rustic, Bohemian, Minimalist, etc.
These constraints are optional. If you skip them, AI will generate a diverse range of ideas across different budgets and styles.
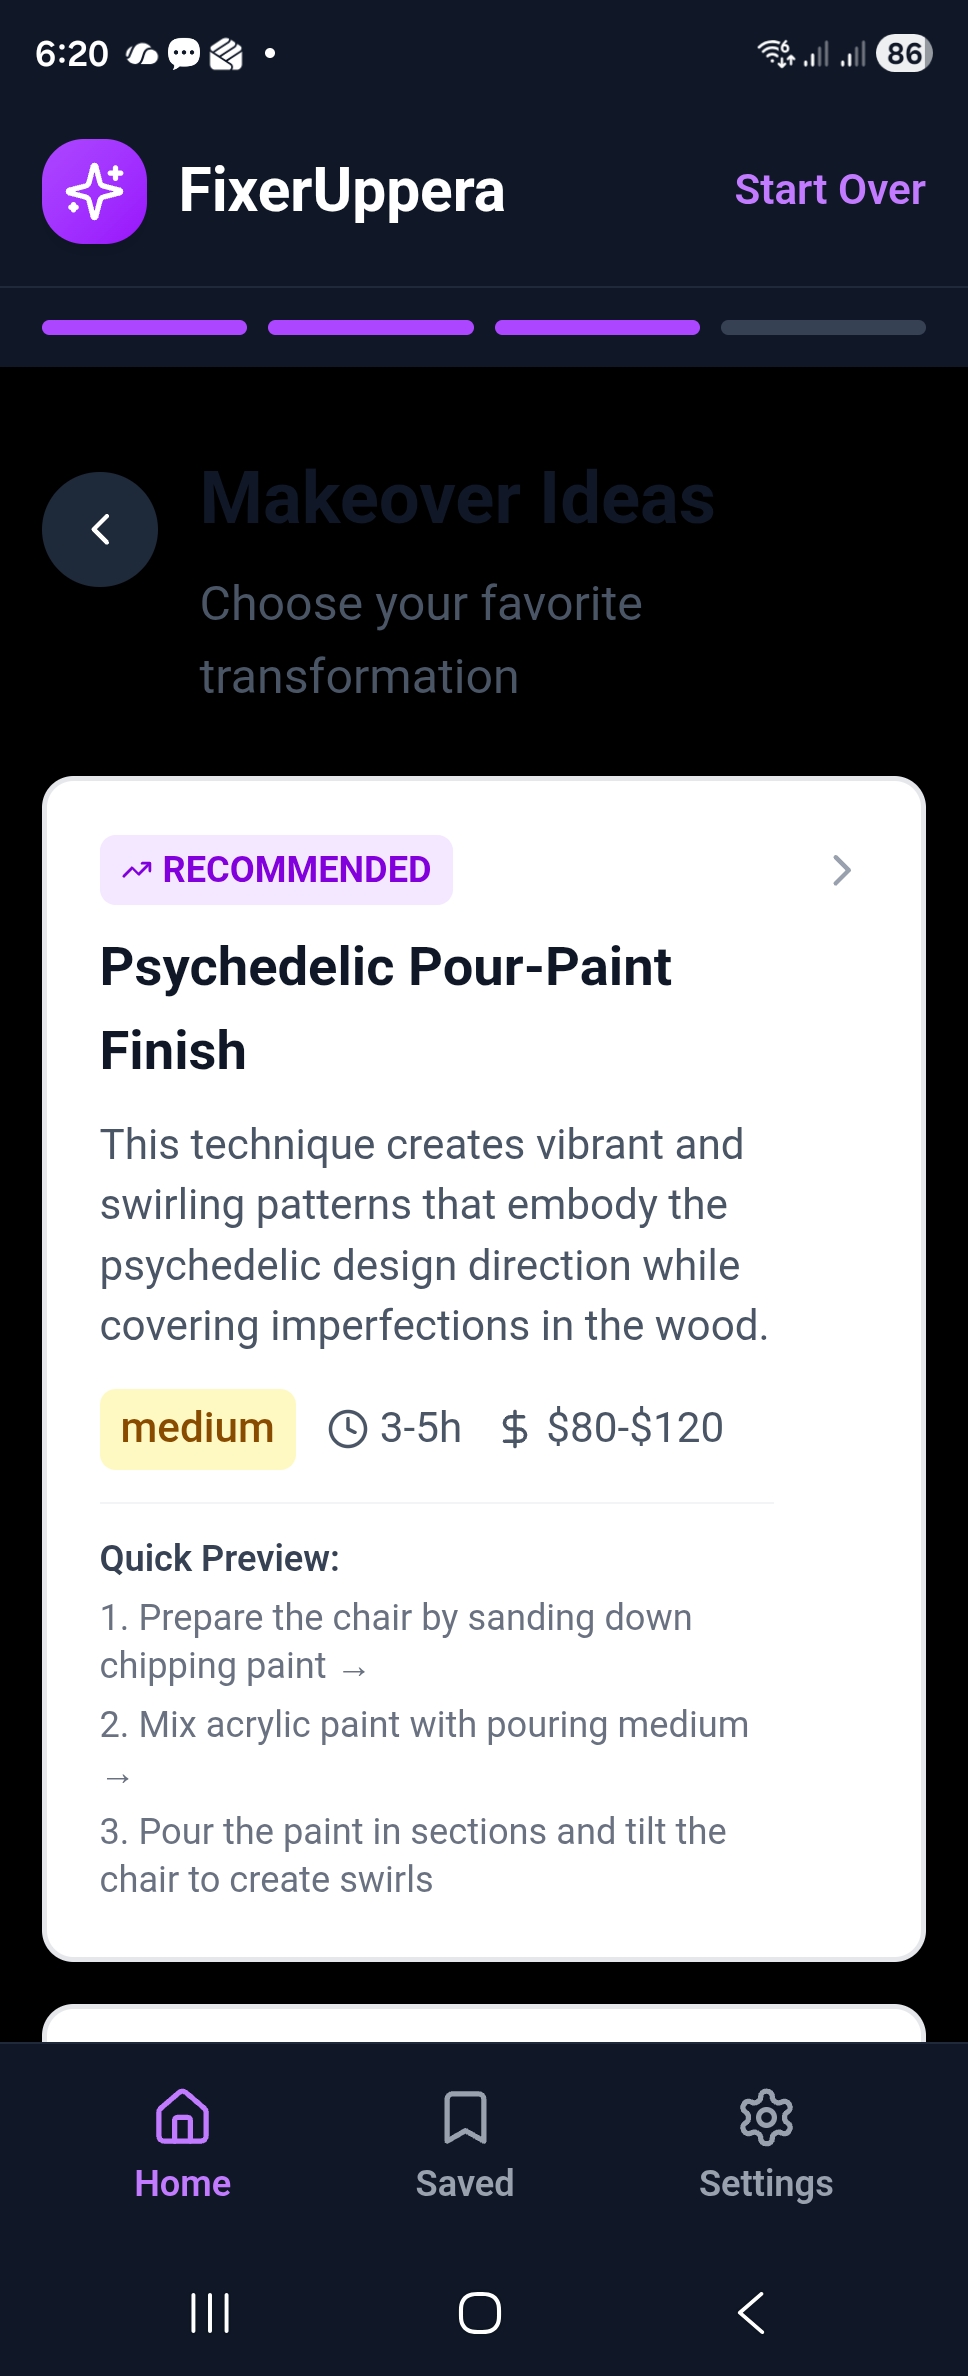
5.4 Transformation Ideas
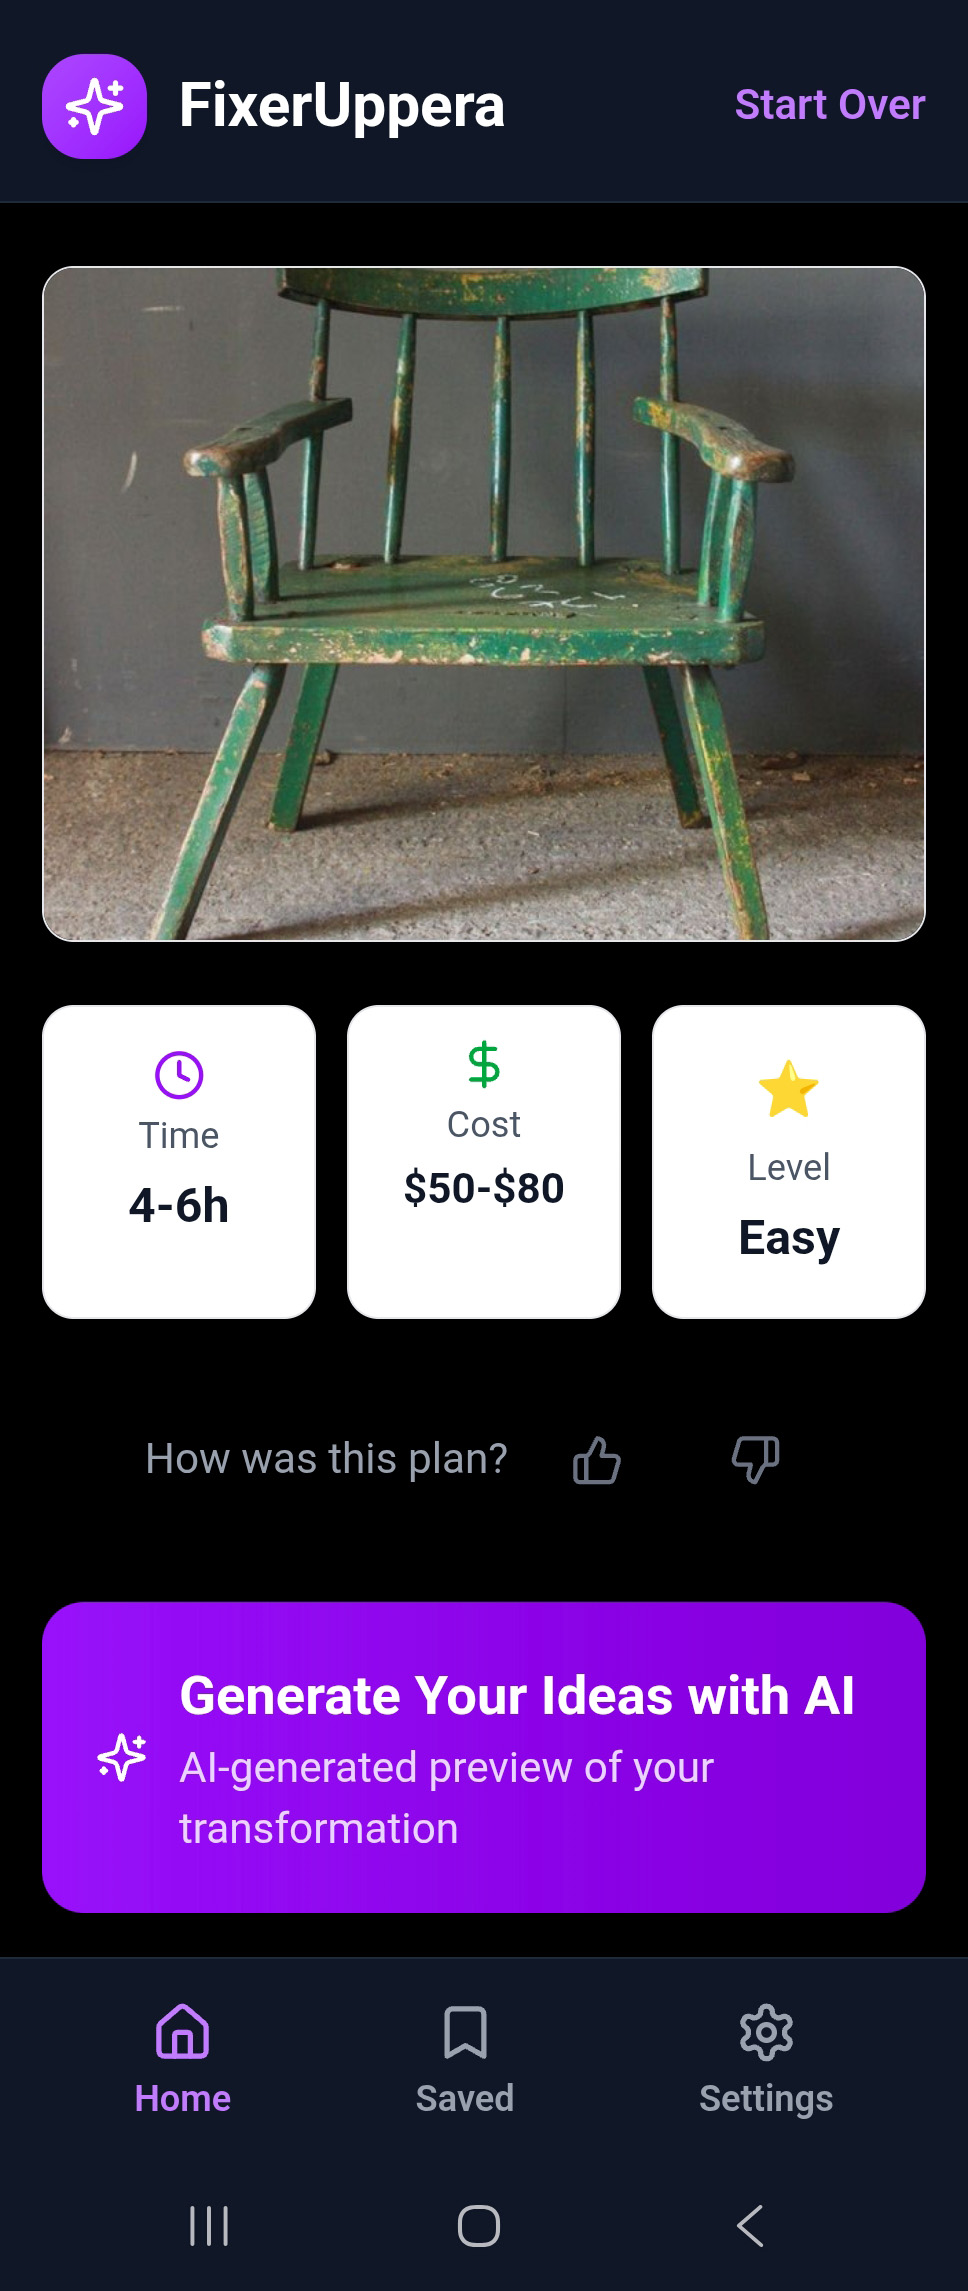
AI generates multiple transformation ideas for your furniture. Each idea includes:
- Title — A descriptive name for the transformation (e.g., “Coastal Beach House Dresser”)
- Description — A brief overview of the concept
- Estimated Cost — Approximate material costs
- Difficulty Level — How challenging the project is
- Time Estimate — How long the project takes
Scroll through the ideas and tap View Plan on any idea to see the full step-by-step instructions.
5.5 Viewing a Plan
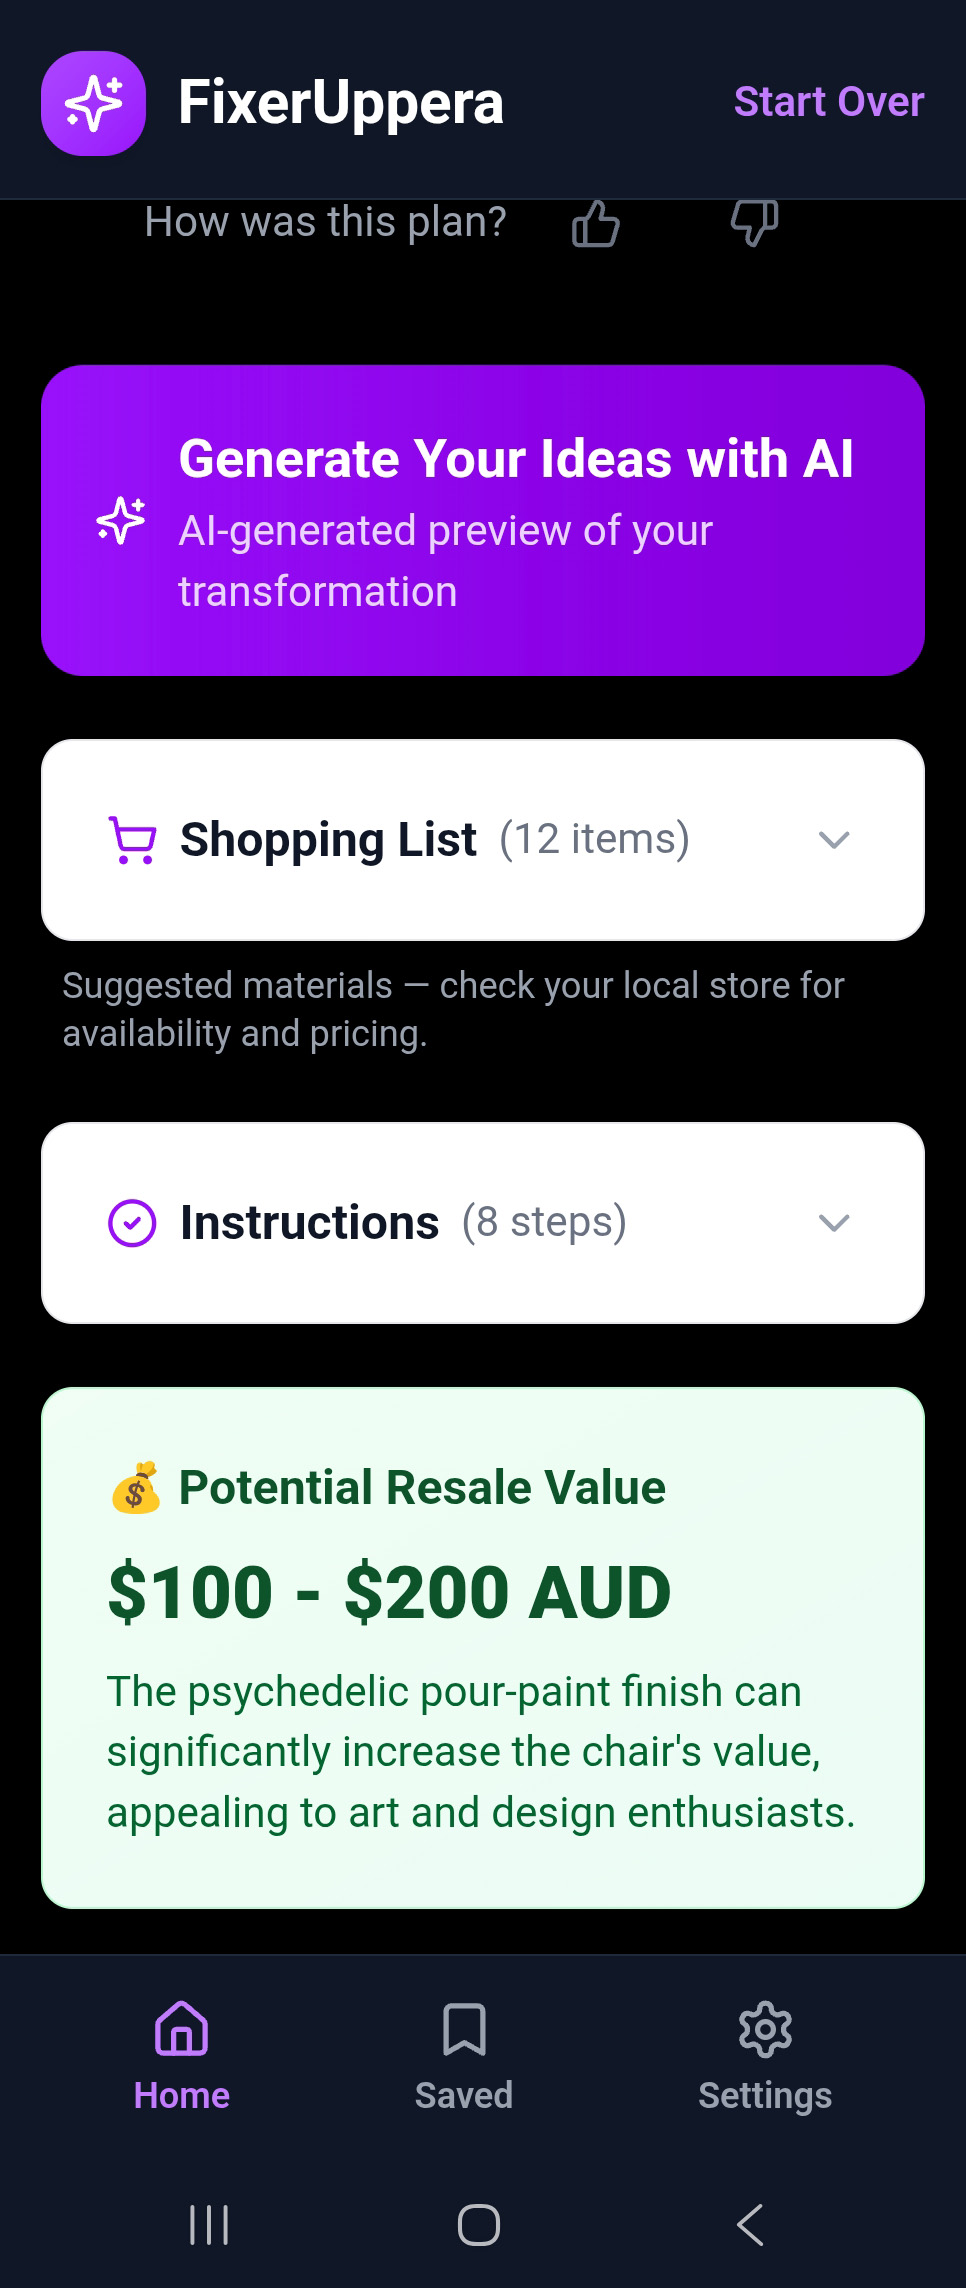
Each plan gives you everything you need to complete the transformation:
Step-by-Step Instructions
Numbered steps from start to finish — surface preparation, priming, painting, finishing, and final touches.
Shopping List
Every material, tool, and supply you need with estimated costs. Organized by category (paints, tools, hardware, supplies).
Cost Breakdown
Total estimated cost with per-item pricing. Costs are approximate and may vary by location.
Time Estimate
How long the project takes, including drying and curing time between steps.
5.6 AI Concept Previews
From the plan screen, tap See Concept Previews to generate AI mockup images showing what the finished transformation could look like.
- Multiple variations are generated so you can compare options
- Each mockup is a unique AI interpretation of the plan
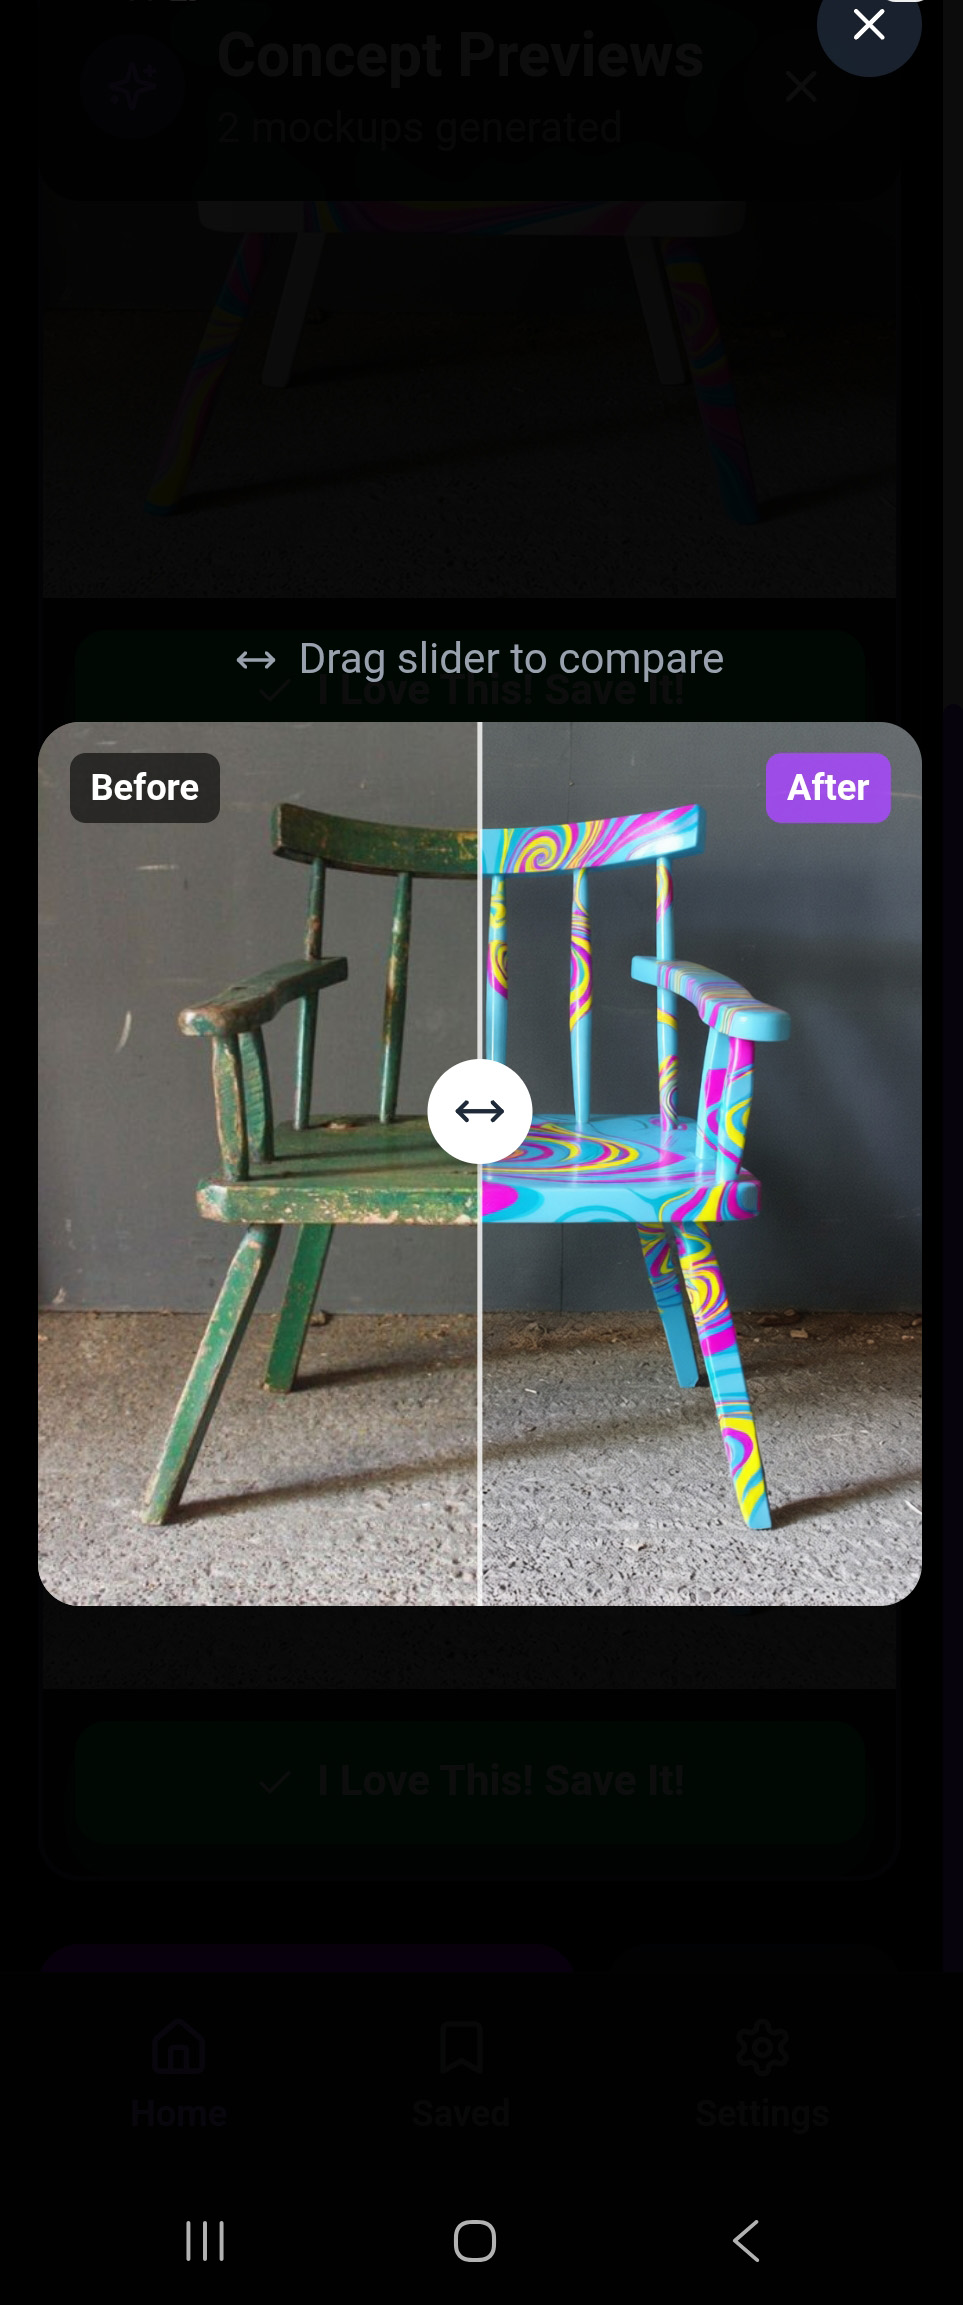
- Use the before/after slider to compare the original photo with the concept preview
- Tap “I Love This! Save It!” to save your favorite mockup
Note: Concept previews are AI-generated approximations. They show a possible outcome to help you visualize the transformation. Actual results will depend on your materials, techniques, and workmanship.
6. Pro Mode
Pro Mode lets you provide two photos — your furniture AND a target inspiration image. AI analyzes both and creates a transformation plan to match the target style.
6.1 Dual Photo Capture
- Switch to Pro Mode using the mode selector
- Capture or upload a photo of your furniture (the “before”)
- Capture or upload a target inspiration image (the style you want to achieve)
- Both photos appear side by side for review
The target image can be anything — a photo from Pinterest, a magazine, a furniture store website, or even another piece of furniture you love.
6.2 Pinterest Inspiration
Don’t have a target image? Tap the Pinterest button to browse inspiration directly from within the app:
- Tap the Pinterest icon on the target photo slot
- Pinterest opens in the app browser
- Browse furniture styles, transformations, and makeover ideas
- Save or screenshot your favorite inspiration
- Return to FixerUppera and upload the image as your target
6.3 Style Matching
Once both photos are captured, AI analyzes the target image to extract:
- Color palette — The dominant and accent colors
- Finish type — Matte, gloss, distressed, etc.
- Style elements — Hardware, patterns, decorative details
- Overall aesthetic — The “feel” of the target piece
AI then creates a plan specifically designed to transform your furniture to match that target style, considering the differences in furniture type, material, and size.
6.4 Side-by-Side Comparison
After style analysis, you’ll see a comparison view showing your furniture alongside the target, with AI’s assessment of what needs to change to achieve the look. From here, you continue to ideas, plans, and concept previews as in Standard Mode.
7. Creative Reuse Mode
Creative Reuse is for when you want to completely reimagine a piece of furniture — not just refinish it, but repurpose it into something entirely different.
Examples of Creative Reuse transformations:
- An old dresser → kitchen island
- A door → headboard or dining table
- A bookshelf → bar cart or mudroom organizer
- A suitcase → side table or pet bed
- A ladder → towel rack or plant stand
How It Works
- Switch to Creative Reuse mode
- Capture or upload a photo of your furniture
- AI identifies the piece and considers its dimensions, material, and structure
- Set optional constraints (budget, skill level)
- AI generates creative repurposing ideas — each with a full plan
- Choose your favorite idea and view the step-by-step plan
Creative Reuse ideas tend to be more ambitious and may require additional tools or skills. The difficulty level and time estimates are clearly shown for each idea.
8. Sell It Mode
Sell It mode is designed for furniture flippers who want to monetize their finished projects. Photograph your completed piece, set your listing preferences, and let AI generate a ready-to-post marketplace listing in seconds.
8.1 Multi-Photo Capture
Unlike other modes, Sell It lets you capture up to 5 photos of your finished piece:
- Switch to Sell It mode using the mode selector
- Tap Take Photo or Upload from Gallery
- Your first photo becomes the hero image (the main listing photo)
- Add up to 4 more photos showing different angles, details, or features
- Remove individual photos by tapping the X on each thumbnail
The more photos you provide, the better the AI can describe your piece. Try to include a front view, side angle, close-up of details, and any unique features.
8.2 Listing Options
Before generating your listing, configure your preferences:
- Description — Optionally add details the AI should know (e.g., “solid oak, newly upholstered seat”)
- Platform — Facebook Marketplace, Gumtree, eBay, or Generic (affects tone and format)
- Tone — Casual, Professional, or Enthusiastic
- Category — Furniture type (chair, table, dresser, etc.)
- Condition — Like New, Excellent, Good, Fair
- Price Range — Your target price bracket
- Location — For local pickup listings
The AI uses all of these settings plus its visual analysis of your photos to craft the perfect listing for your chosen platform.
8.3 Your AI-Generated Listing
AI generates a complete, ready-to-post listing that includes:
Listing Title
An attention-grabbing title optimized for the chosen platform’s search and browsing.
Description
A detailed, engaging description highlighting materials, dimensions, features, and condition. Formatted for the selected platform.
Key Bullet Points
Scannable highlights that buyers look for — dimensions, materials, style, condition, and standout features.
Hashtags
Toggleable hashtags to boost visibility. Select which ones to include when you copy or share.
Price Recommendation
AI-suggested pricing based on the piece, condition, and market trends for your region.
Platform Tips
Specific advice for maximizing your listing on the chosen platform (best posting times, photo tips, pricing strategies).
The title and description are fully editable — tweak anything before posting. Tap Regenerate if you want a fresh version.
8.4 Copy, Share & Export
Once you’re happy with your listing, you have several options:
- Copy — Copy the full listing text to your clipboard, ready to paste directly into any marketplace
- Share — Use your device’s share sheet to send via Messages, WhatsApp, Email, or social media
- Download ZIP — Export your photos and listing text as a ZIP file for easy uploading to any platform
9. Plans & Shopping Lists
Every transformation idea comes with a detailed plan. Here’s what each plan includes:
Step-by-Step Instructions
Each plan is broken into numbered steps, organized by phase:
Shopping List
The shopping list is organized by category and includes:
- Item name and quantity
- Estimated price per item
- Category (Paints & Stains, Tools, Hardware, Supplies)
- Total estimated project cost at the bottom
Note: Prices are AI-generated estimates based on typical retail costs. Actual prices will vary by location, store, and availability. Always check local prices before purchasing.
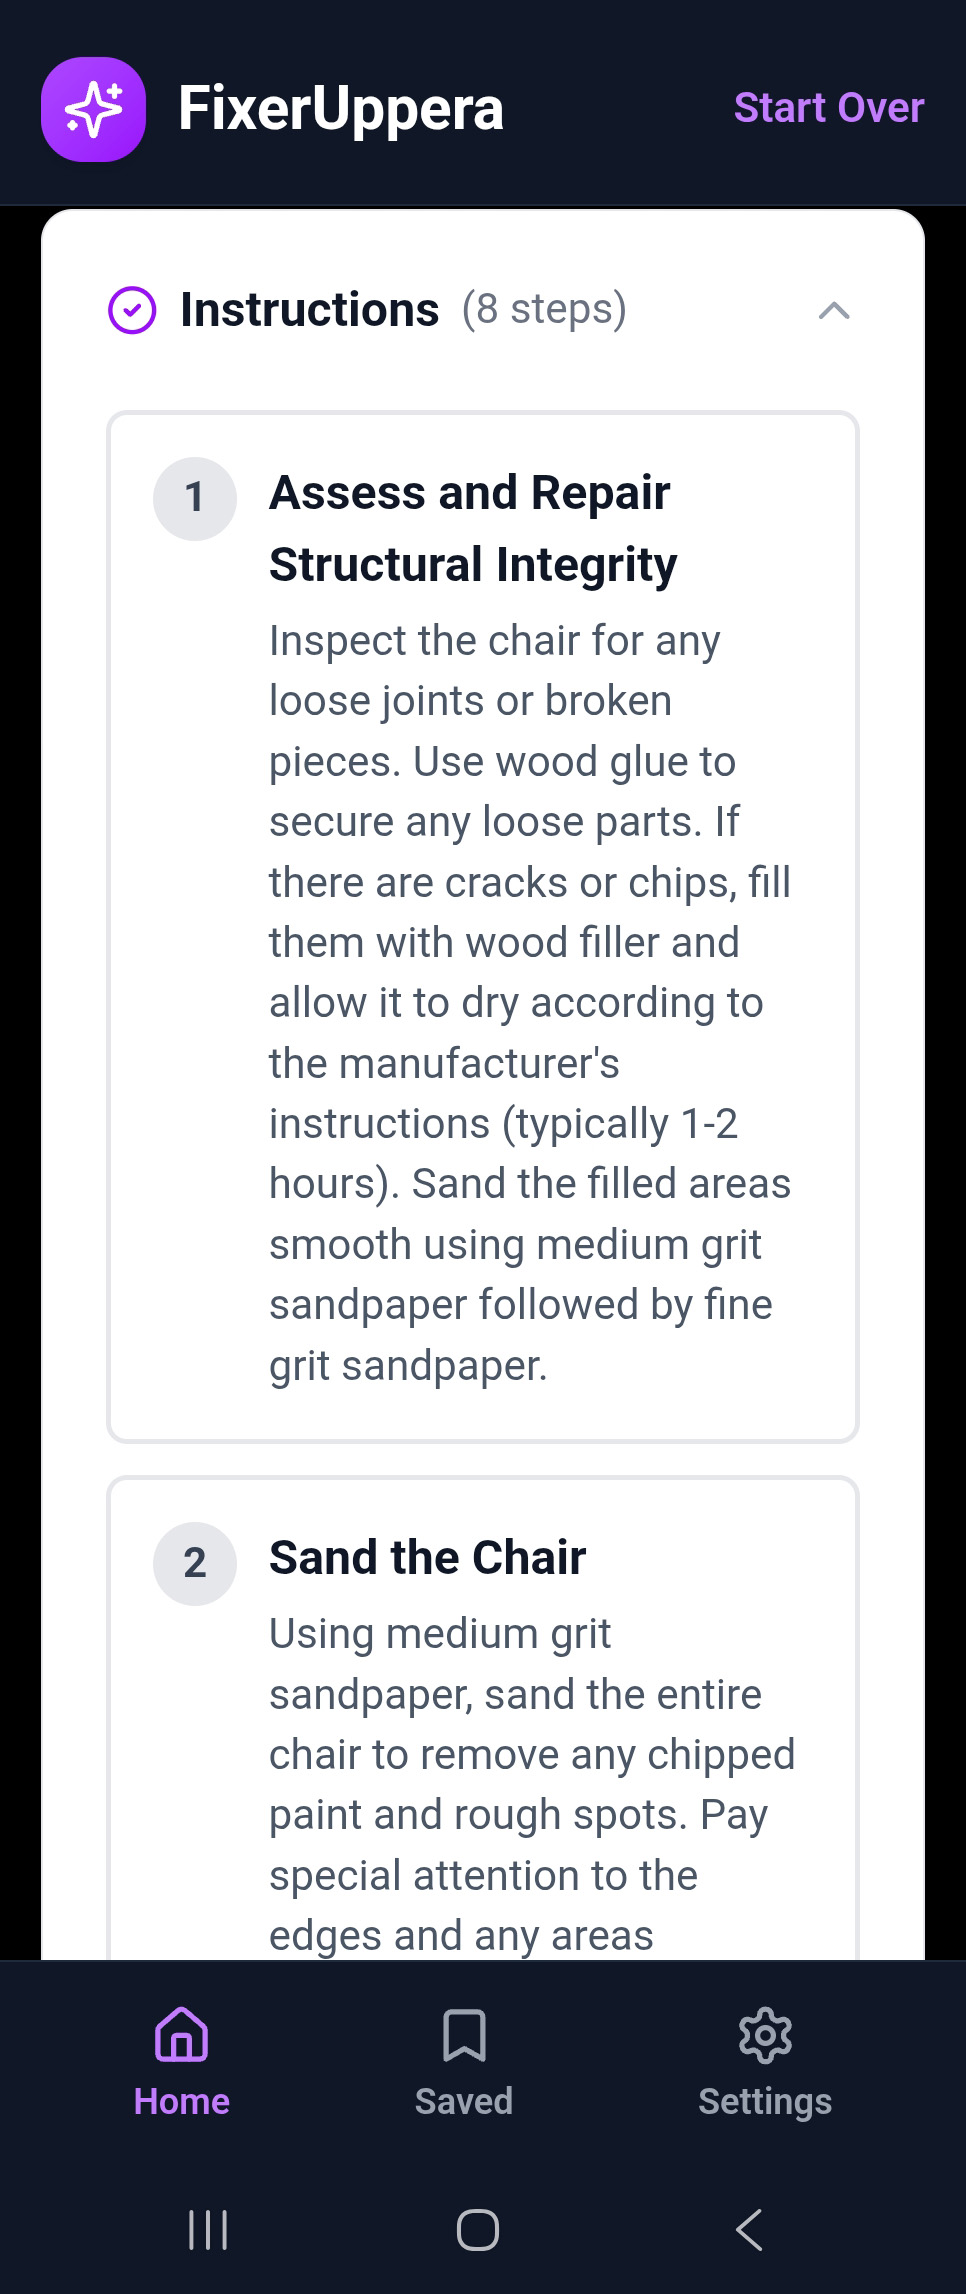
Step-by-step instructions
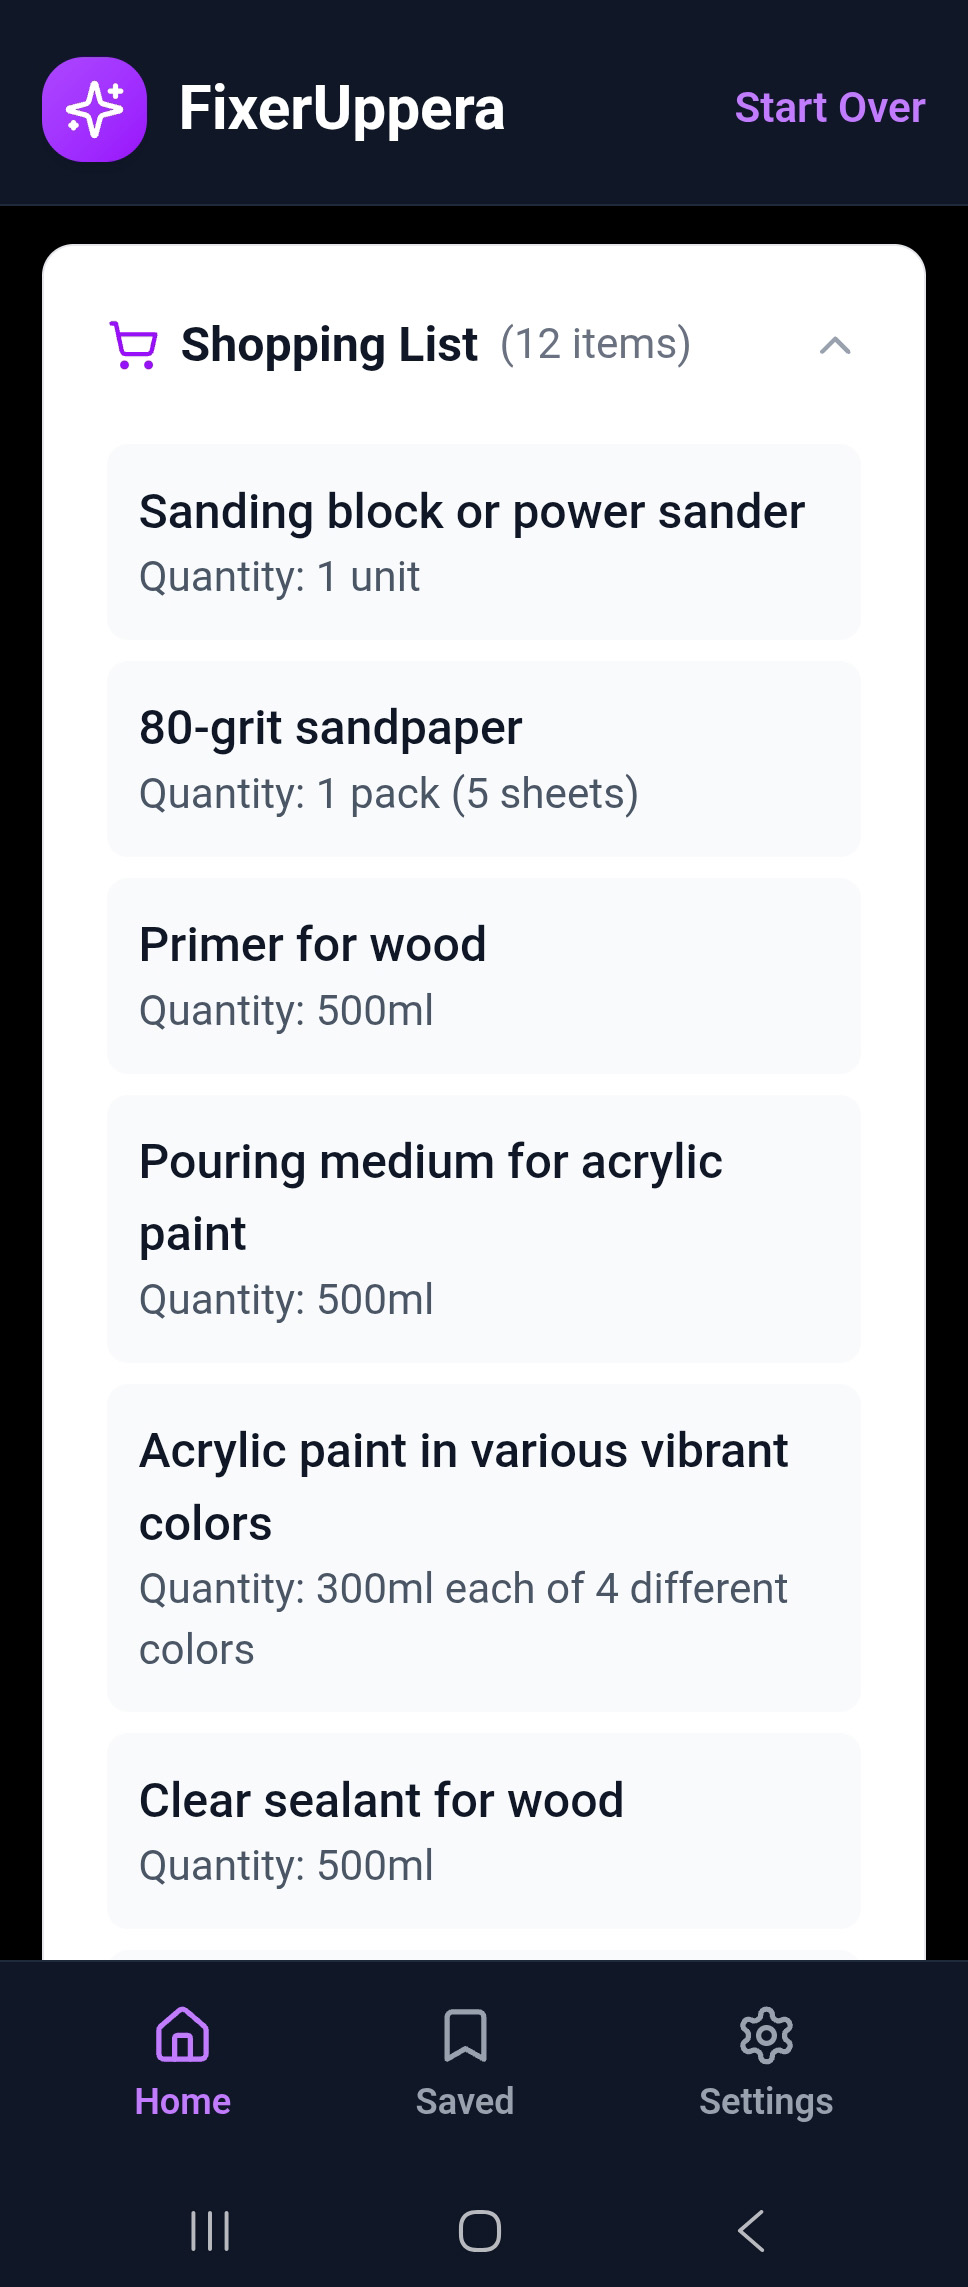
Shopping list with quantities
10. AI Concept Previews & Before/After
Generating Concept Previews
From any plan, tap See Concept Previews to generate AI mockup images. The AI takes your original photo and applies the transformation described in the plan to create realistic preview images.
- Multiple variations are generated (typically 3-4 images)
- Each variation has slight differences in color, finish, and styling
- Generation takes 10-30 seconds depending on complexity
Before/After Slider
Tap on any concept preview to open the interactive before/after comparison:
- Drag the slider handle left and right to reveal the original photo vs. the concept preview
- This helps you visualize the transformation and decide if you like the direction
Saving a Concept Preview
Found one you love? Tap the green “I Love This! Save It!” button to save the mockup image to your project. It will be stored locally on your device along with the associated plan.
11. Saving & Sharing
Save a Plan
Tap the Save button on any plan to store it locally on your device. Saved plans include:
- The original furniture photo
- The full step-by-step plan
- The shopping list with costs
- Any saved concept preview images
Share a Plan
Tap the Share button to send a plan to friends, family, or social media. The share feature uses your device’s native share sheet, so you can send via:
- Messages or WhatsApp
- Social media (Instagram, Facebook, etc.)
- Save to Files or Notes
Export
Plans can be exported as a formatted summary that includes the plan name, steps, and shopping list — perfect for printing or referencing while you work.
12. Saved Projects
Access all your saved projects from the Saved tab on the home screen. Each saved project shows:
- Thumbnail of the original furniture photo
- Plan title and transformation type
- Date saved
- Saved concept preview (if any)
Tap any saved project to reopen the full plan with all details. You can also delete saved projects by swiping or using the delete option.
Important: All data is stored locally on your device. If you uninstall the app or clear its data, saved projects will be lost. Consider exporting important plans before clearing data.
13. Tips for Best Results
Taking Better Photos
- Use natural lighting when possible — avoid harsh shadows or dim rooms
- Capture the entire piece in the frame — don’t crop off legs or edges
- Shoot straight on rather than at extreme angles
- Avoid cluttered backgrounds that might confuse the AI
- If the piece has unique details (carvings, hardware), try to capture them clearly
Getting Better Ideas
- Use constraints to narrow results — specifying a budget or style produces more focused ideas
- Try different modes for the same piece — Standard and Creative Reuse give very different results
- In Pro Mode, choose a clear target image — close-up photos with visible colors and textures work best
Safety Reminders
- Always work in a well-ventilated area when using paints, stains, or chemical strippers
- Wear protective equipment — gloves, safety glasses, and a mask when sanding or painting
- Follow product instructions on all paints, stains, and sealants
- If the plan suggests structural modifications, consult a professional if you’re unsure
- AI-generated plans are suggestions, not professional advice — use your judgment
14. FAQ
Is FixerUppera free?
FixerUppera is free to use during the trial period, with limitations on AI generations. See the app for current pricing and plan details.
Do I need an internet connection?
Yes. The app uses AI services to identify furniture, generate ideas, create plans, and produce concept previews. All processing happens in the cloud and requires an active internet connection.
Are concept previews accurate?
Concept previews are AI-generated approximations designed to help you visualize a transformation. They show a possible outcome but are not a guarantee. Your actual results will depend on your materials, skill level, and techniques.
What happens to my photos?
Your photos are sent to AI services for processing and are not stored on our servers after the response is returned. We do not share, sell, or use your photos for any purpose other than generating your transformation results. See our Privacy Policy for full details.
Can I use it for any type of furniture?
FixerUppera works best with common furniture types: chairs, tables, dressers, desks, bookshelves, cabinets, benches, nightstands, and more. It may struggle with very unusual or custom pieces, but you can always try!
How accurate are the cost estimates?
Cost estimates are approximate and based on typical retail prices. Actual costs will vary depending on your location, the stores you shop at, and current pricing. We recommend checking local prices before purchasing materials.
Is my data backed up?
All saved plans and concept previews are stored locally on your device. There is no cloud backup. If you uninstall the app or clear its data, your saved projects will be deleted. We recommend exporting important plans before making any changes.
What’s the difference between Standard and Pro Mode?
Standard Mode uses a single photo and AI generates diverse transformation ideas. Pro Mode uses two photos — your furniture plus a target style image — and AI creates a plan specifically designed to match that target look.
What is Sell It mode?
Sell It mode helps you sell your finished furniture flips. Photograph your completed piece (up to 5 photos), choose a marketplace platform (Facebook, Gumtree, eBay, or Generic), and AI generates a complete listing with title, description, bullet points, hashtags, and a price recommendation — ready to copy and post.
Can I use screenshots from Pinterest as target images?
Yes! Pro Mode works great with Pinterest screenshots, photos from design magazines, furniture store websites, or any image that shows the style you want to achieve. The app even has a built-in Pinterest button to make browsing easy.
Is FixerUppera available on iPhone?
Currently, FixerUppera is only available on Android via Google Play. An iOS version may be considered in the future.
15. Troubleshooting
The app says “No internet connection”
FixerUppera requires an active internet connection for all AI features. Try:
- Check your Wi-Fi or mobile data connection
- Toggle airplane mode on and off
- Try a different network
- Restart the app
AI identification is incorrect
If AI misidentifies your furniture:
- Try retaking the photo with better lighting
- Make sure the entire piece is visible in the frame
- Avoid cluttered backgrounds that may confuse the AI
- Try shooting from a different angle
Concept previews are taking too long
Concept preview generation typically takes 10-30 seconds. If it’s taking longer:
- Check your internet speed — a slow connection will delay results
- The AI service may be experiencing high demand — try again in a few minutes
- If a preview fails to generate, you can retry from the plan screen
The app crashed or froze
- Close the app completely and reopen it
- Make sure you’re running the latest version from Google Play
- Clear the app’s cache (Settings → Apps → FixerUppera → Clear Cache)
- If the issue persists, try uninstalling and reinstalling (note: saved projects will be lost)
Camera permission denied
If you accidentally denied camera access:
- Open your device’s Settings
- Go to Apps → FixerUppera
- Tap Permissions
- Enable Camera access
You can still upload photos from your gallery without camera permission.
Still need help?
Contact us at hello@fixeruppera.app and we’ll get back to you as soon as possible.
© 2026 FixerUppera. All rights reserved.